What a teacher sees, screen by screen
This page walks through the PROVE it! teacher account the way a teacher uses it, from signing in to reading the class report. The screens are captured from the product itself with a fictional teacher, two grade 6 classes and a few weeks of sample tests, so the layout and the numbers are what a teacher would see on an ordinary day.
Every student name is invented. Nothing on this page opens the tool; it is meant to be read top to bottom in a few minutes.
The teacher's home page
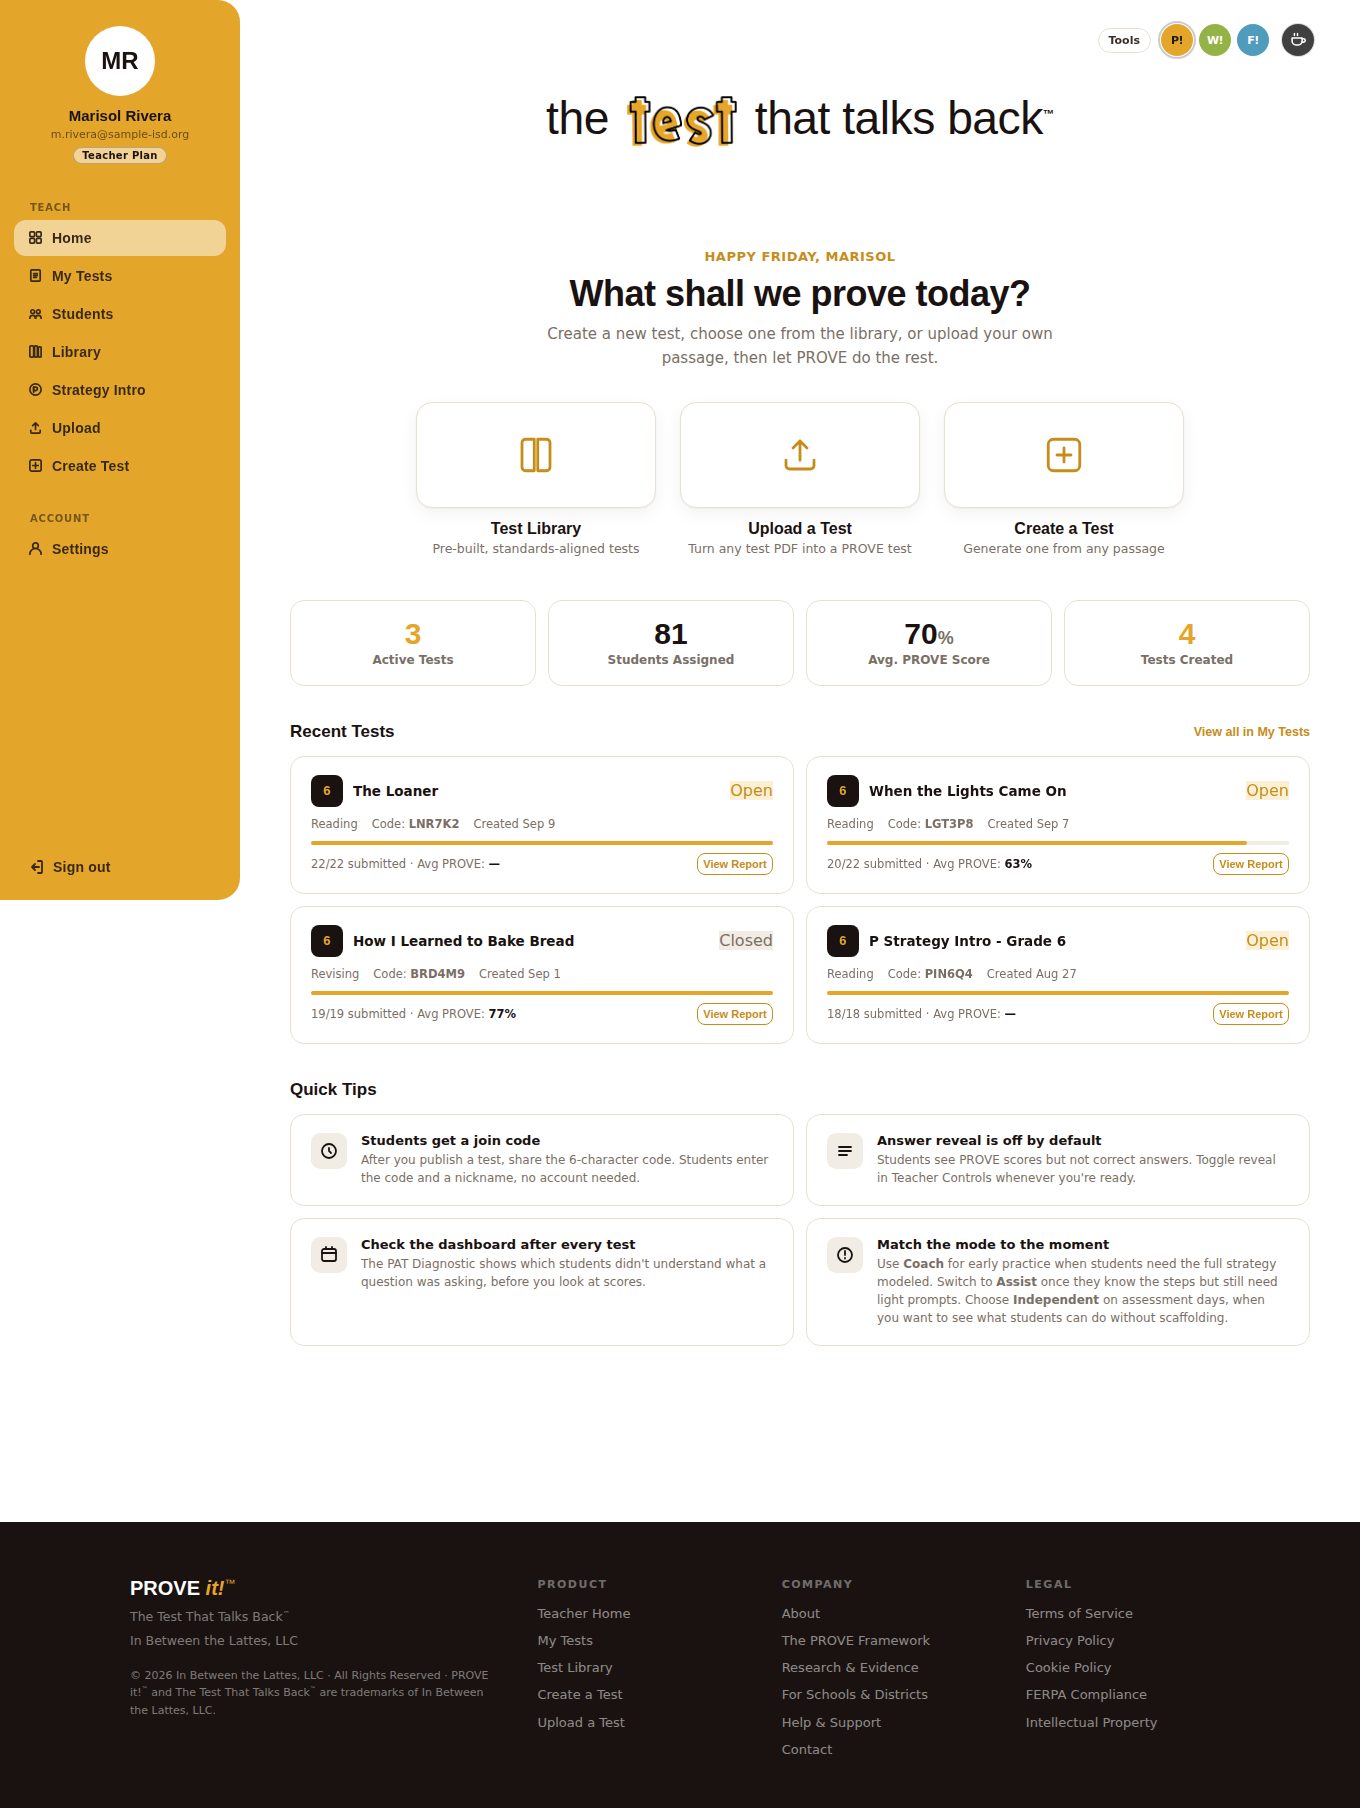
This is what Ms. Rivera sees when she signs in: her active tests, how many students have been assigned, the class average on the PROVE strategy, and her four most recent tests with submission bars. Everything else is one click away in the left rail.
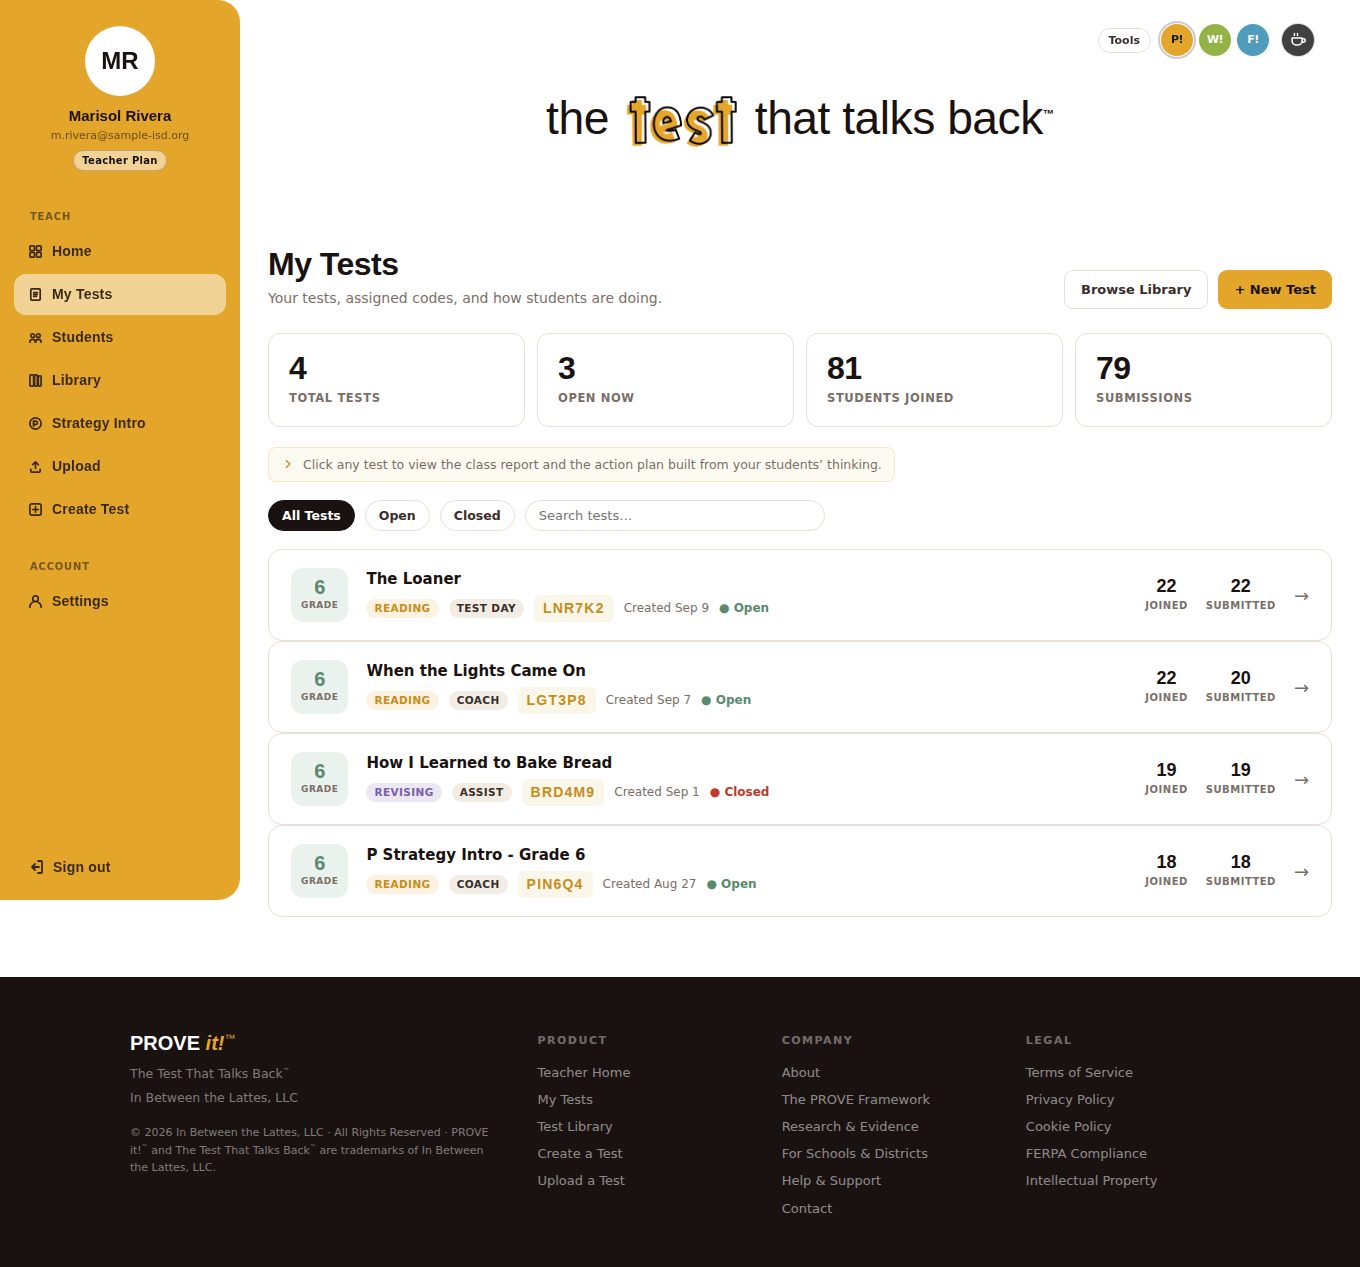
Every test she has launched
Each row is one test with its grade, section, coaching mode, join code, and how many students joined and submitted. Clicking a row opens that test's class report. Tests can be closed and reopened from here.
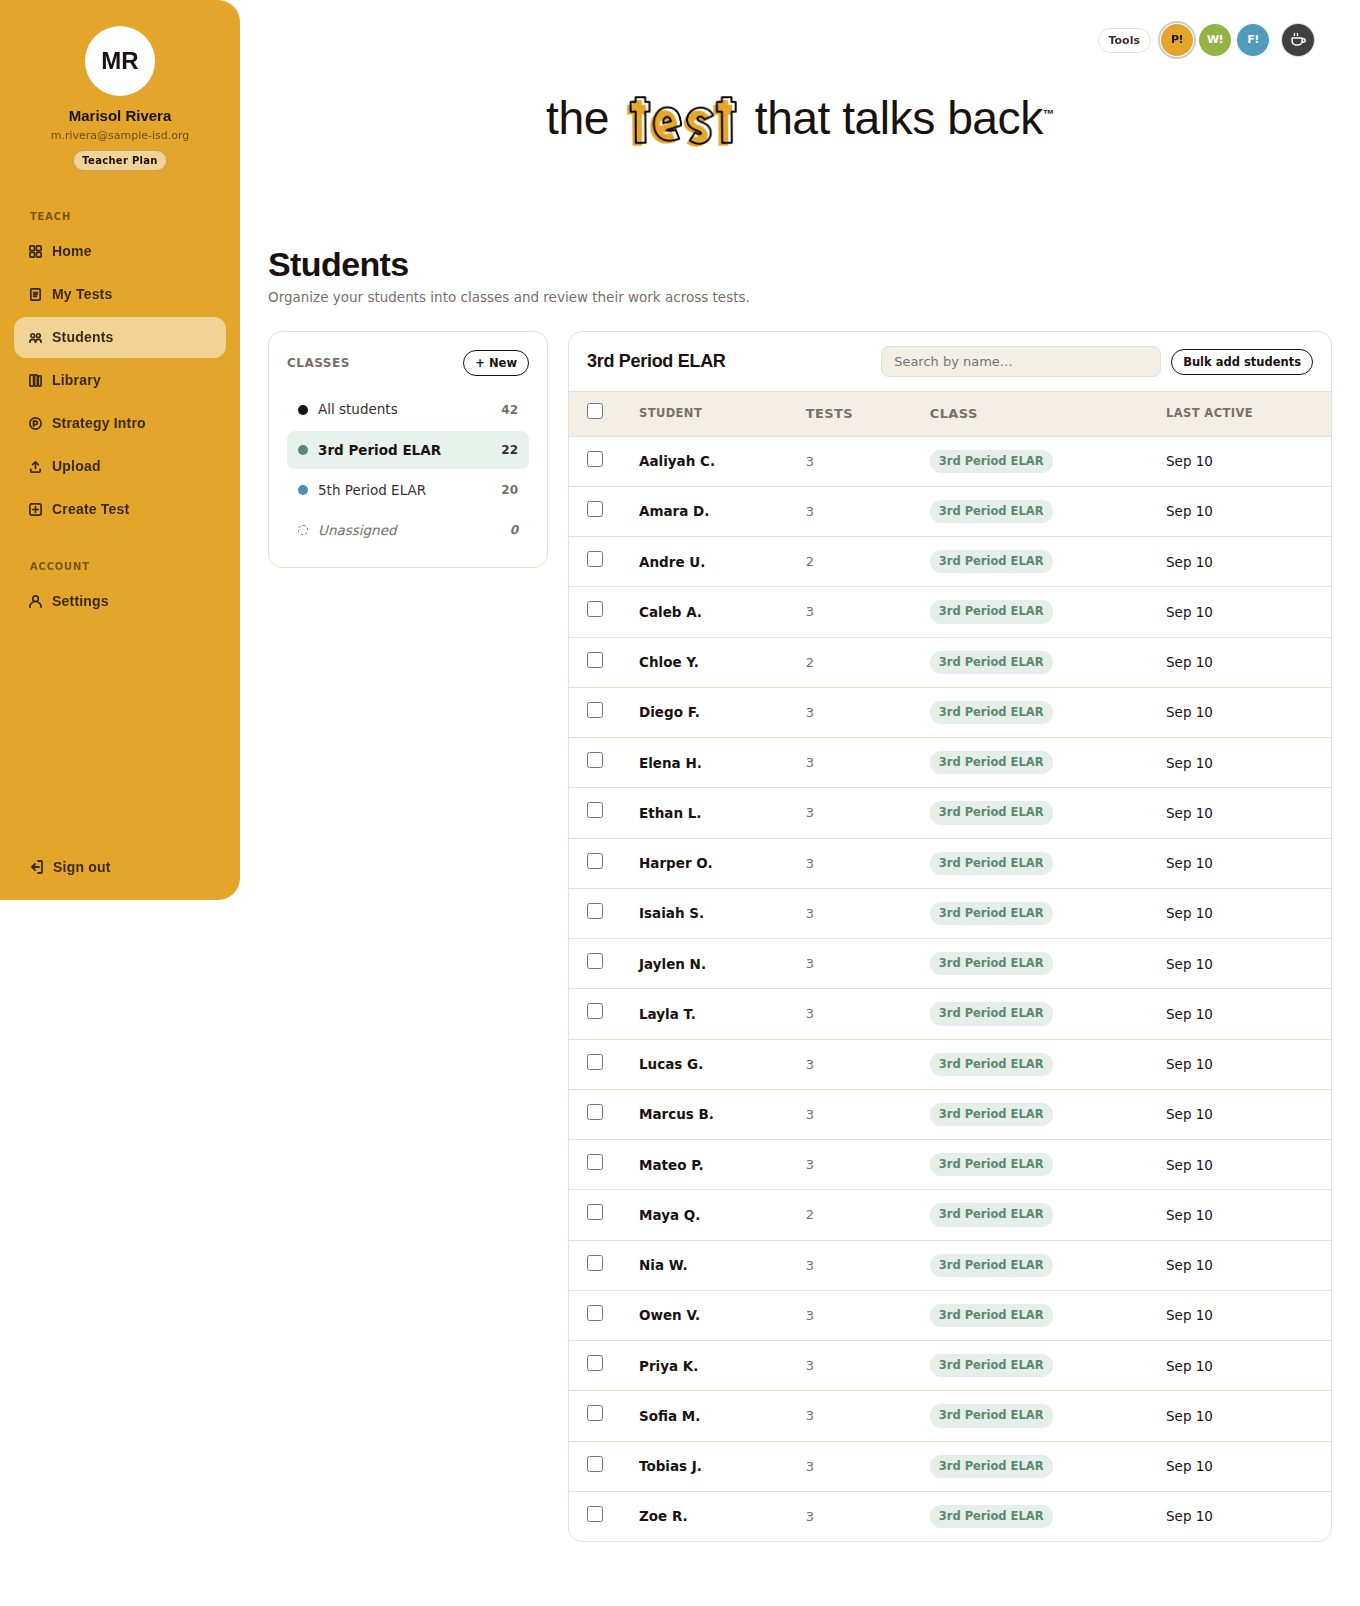
The class roster
Students are grouped by class period; this is 3rd Period ELAR with 22 students, and the number beside each name is how many tests they have completed. Students never create accounts. They type a first name and last initial, and the roster matches them.
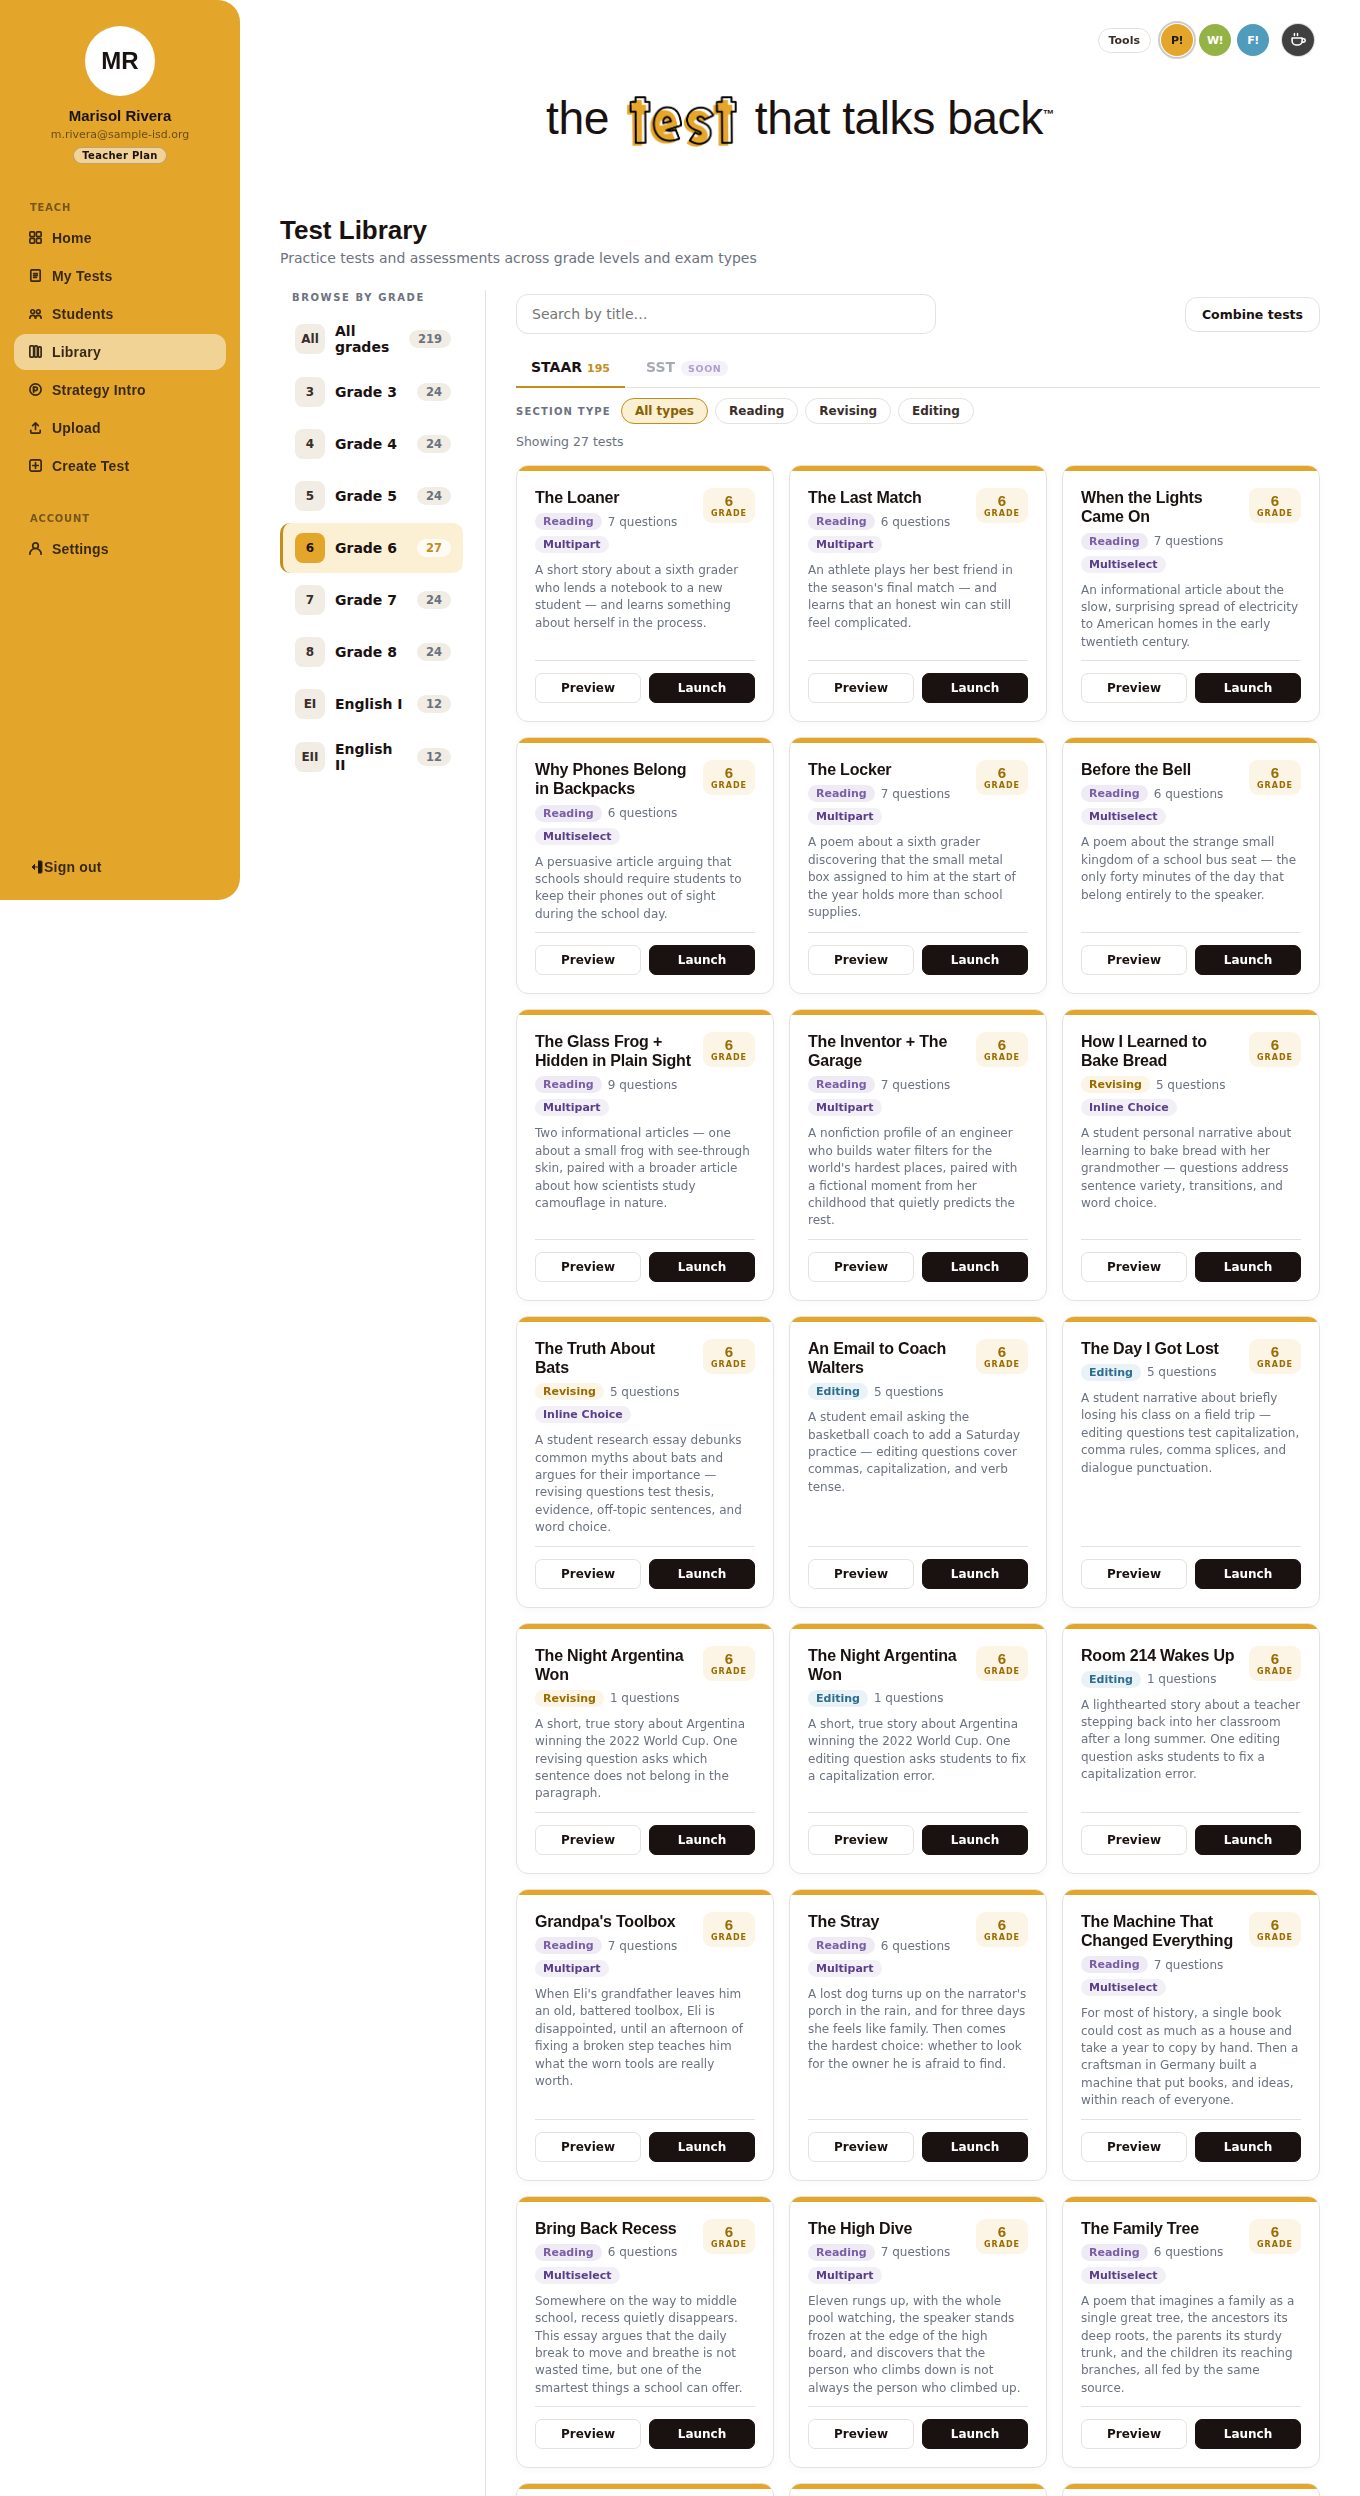
Choosing a test from the library
The library is filtered to grade 6 here: 27 STAAR-style reading, revising and editing tests, each with a short description and question count. Preview opens the passage and questions; Launch goes to the settings screen below. Two to four tests can be combined into one longer test.
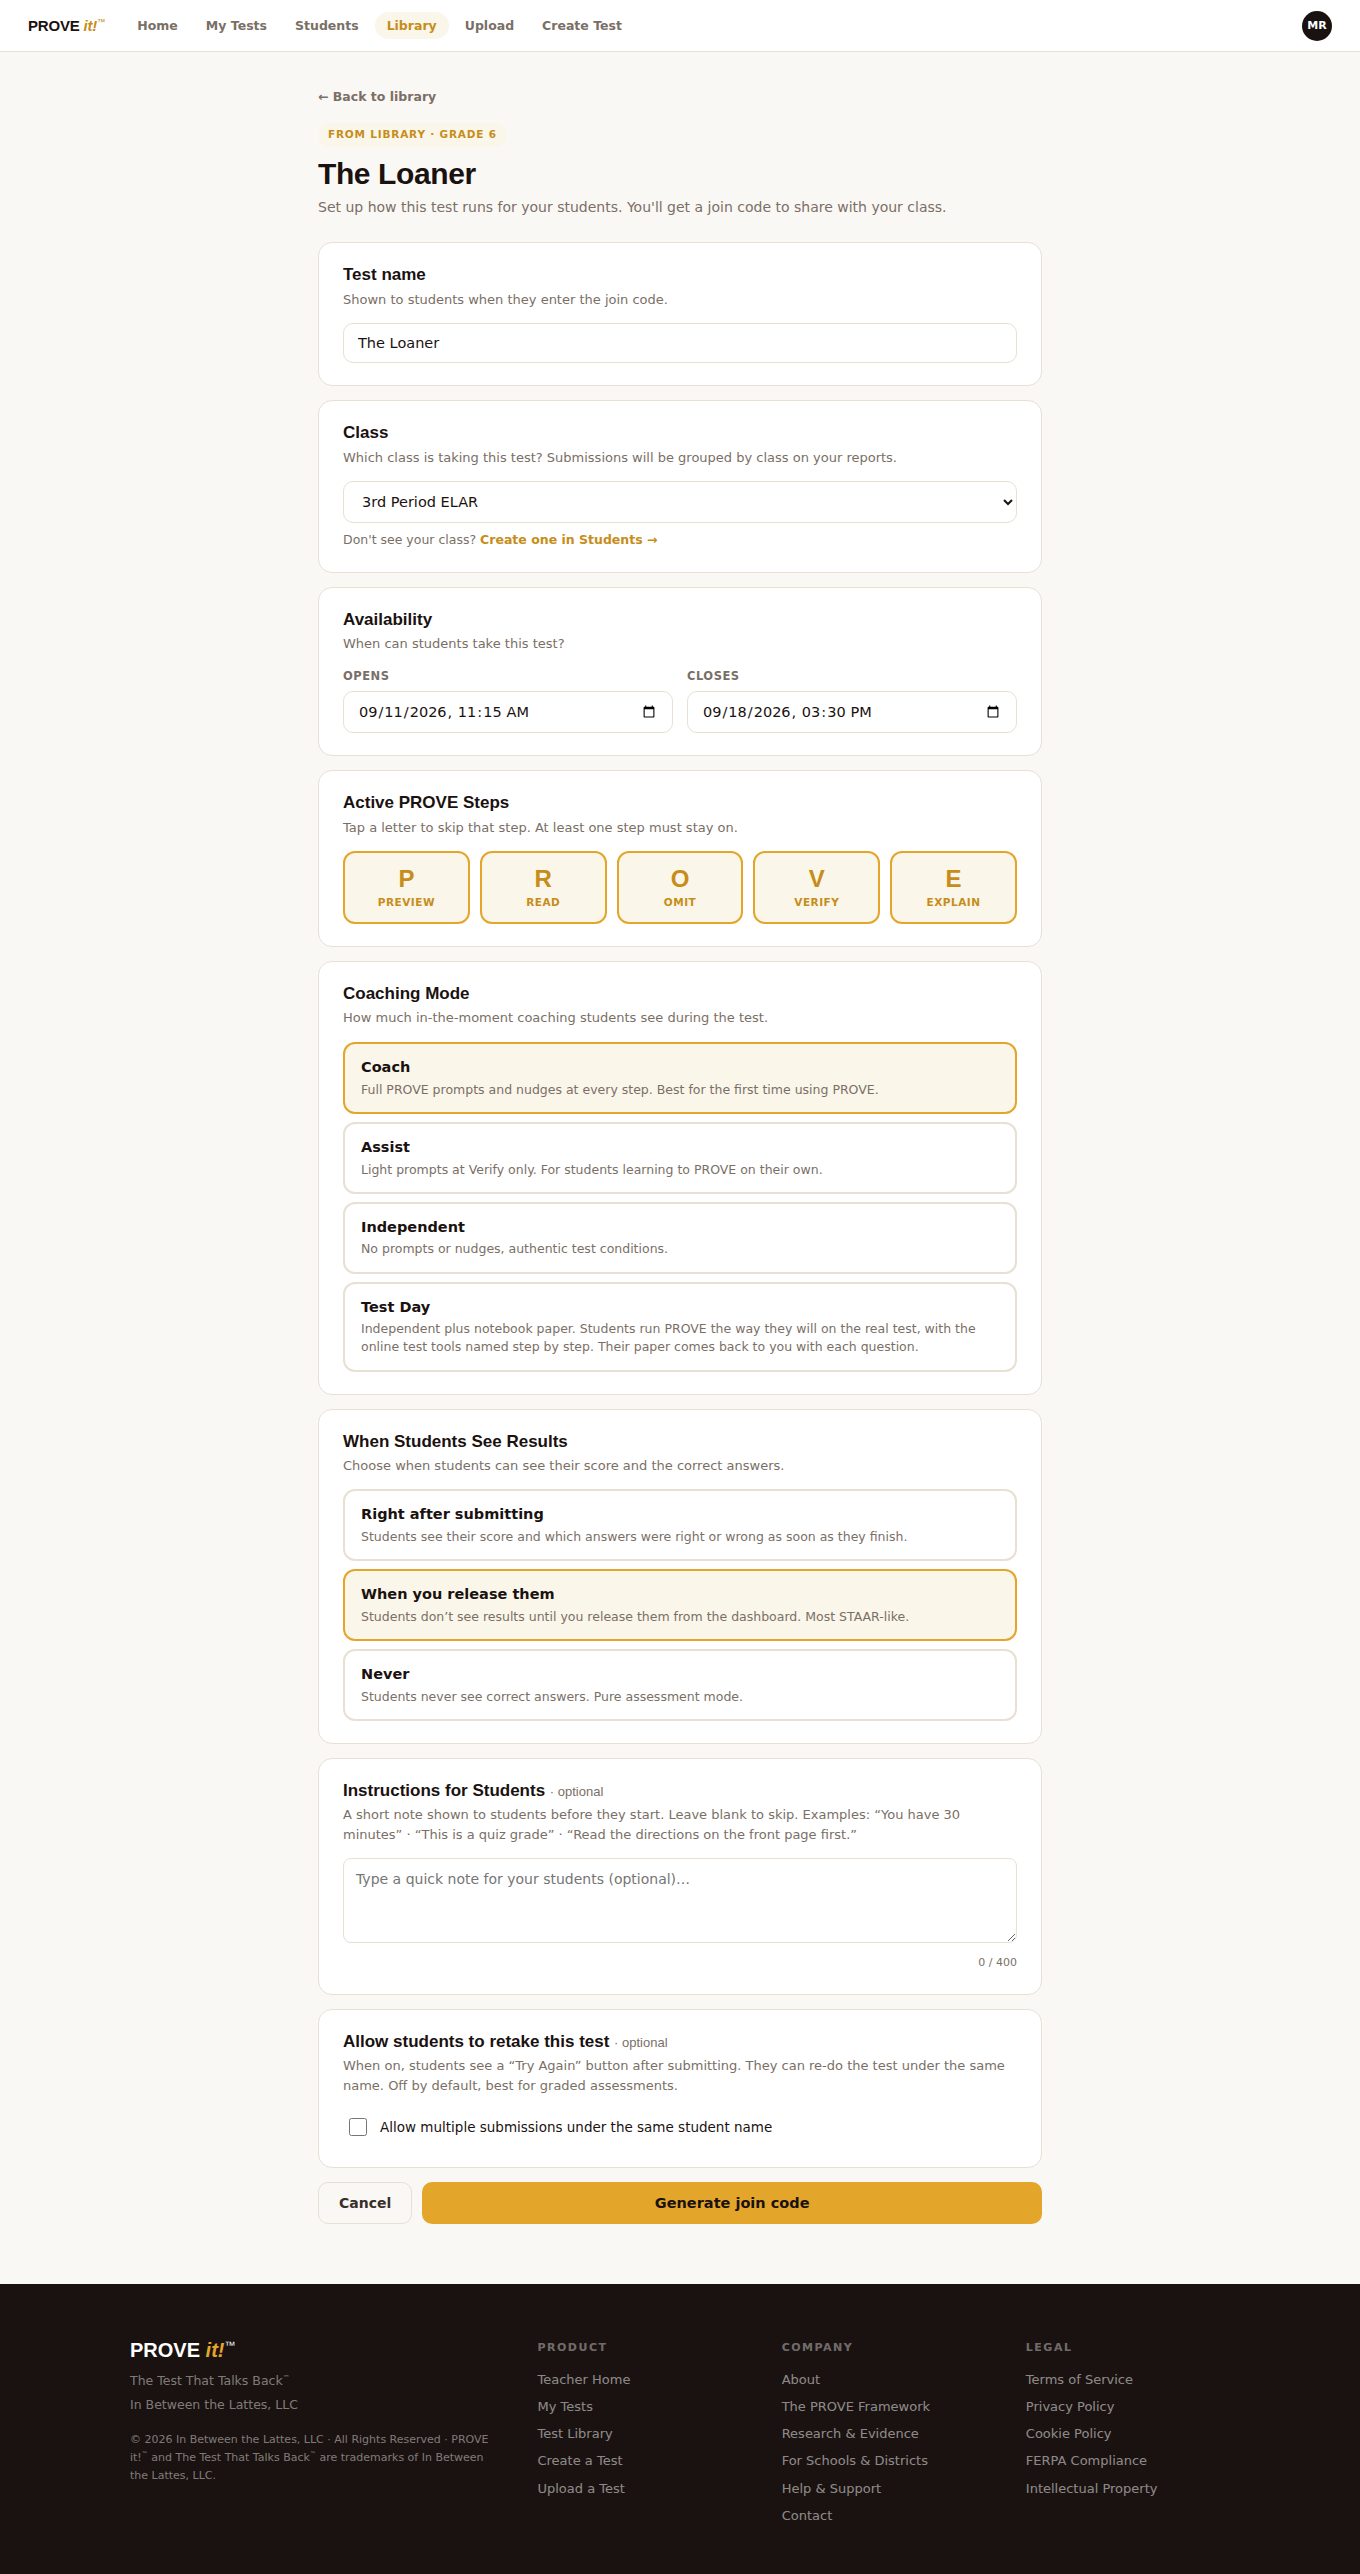
Setting up the test
Before a join code is issued the teacher picks the class, the open and close window, which PROVE steps are on, a coaching mode (Coach, Assist, Independent or Test Day), when students see results, and whether retakes are allowed.
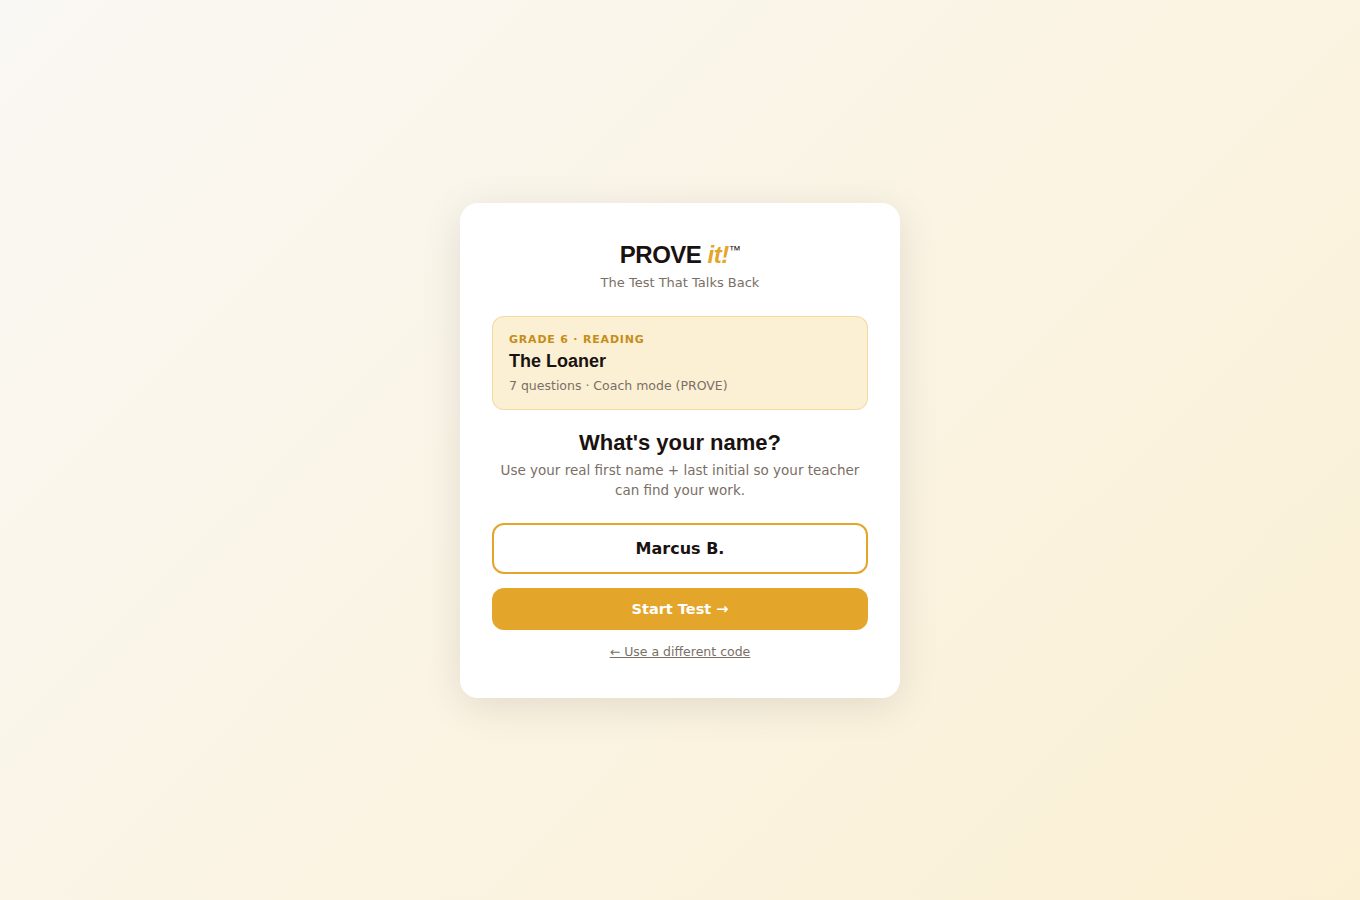
What a student sees first
A student goes to the join page, types the six-character code, then a first name and last initial. There is no login, no email address and nothing to install. The card confirms which test they are about to take and in which mode.
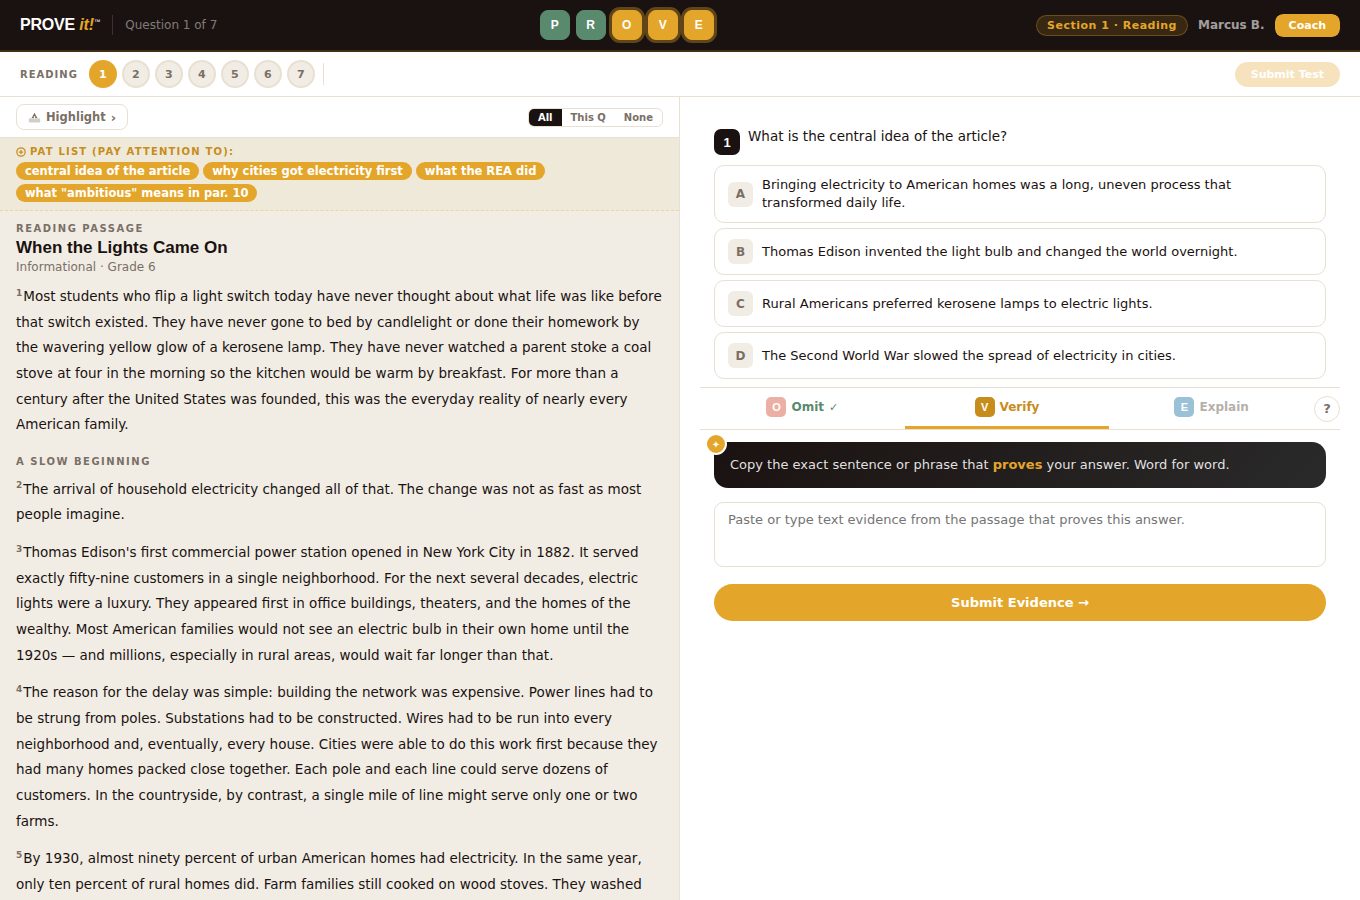
Inside the test: the PROVE steps
Question 1 of 7 in Coach mode. The student's PAT list from the Preview step sits above the passage on the left. On the right they have chosen an answer and omitted the wrong ones, and the Verify step now asks them to paste the exact sentence that proves it before they can explain.
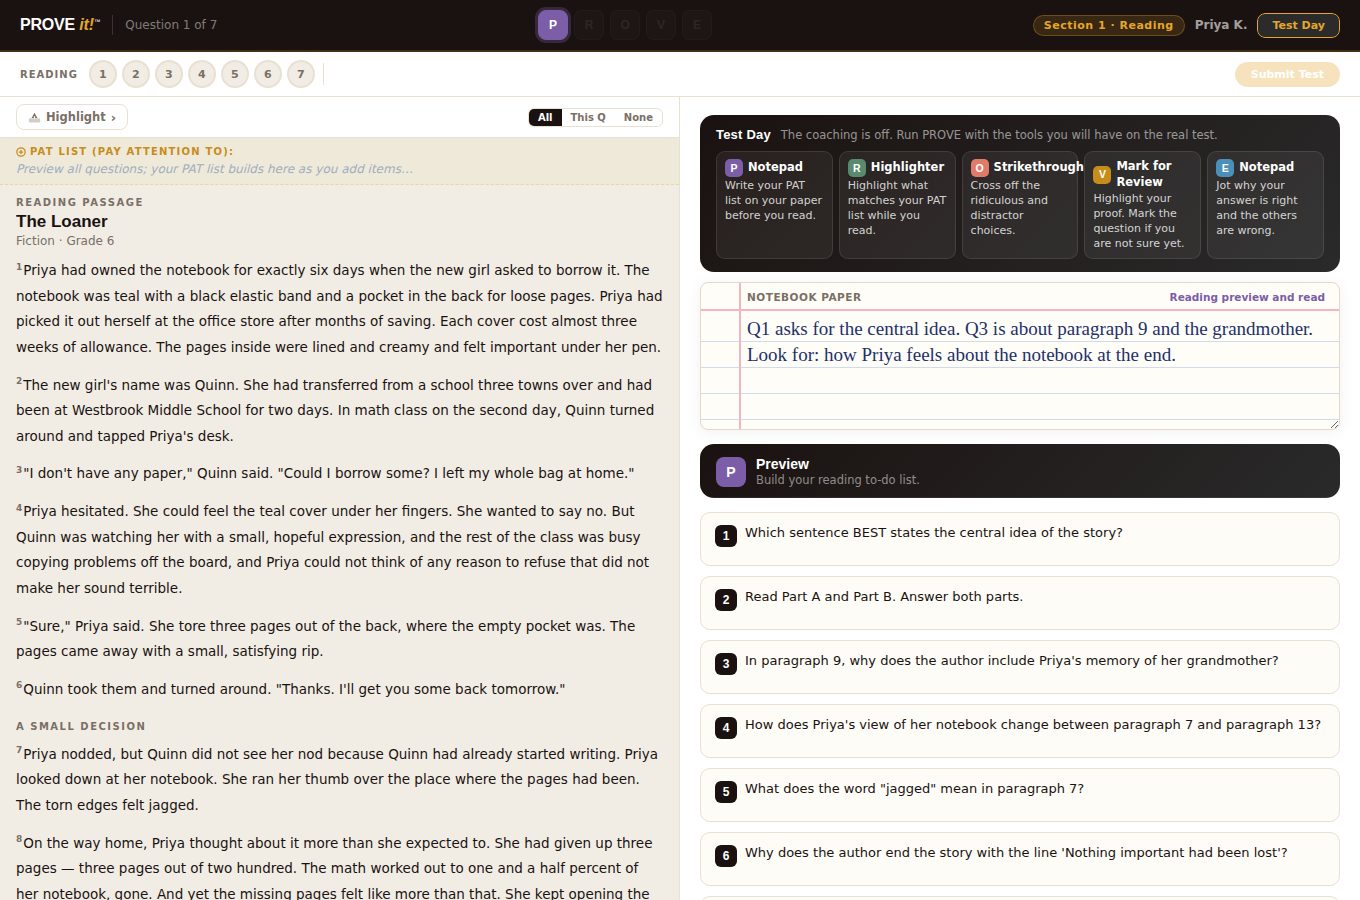
Test Day mode
The same tool with the coaching turned off. The strip at the top names the real testing tools that stand in for each PROVE step, and the notebook paper is saved with every question so the teacher can read what the student was thinking afterward.
The class report, the same afternoon
Every student in 3rd Period on one page: answer accuracy, the PROVE strategy score, practice bands with cut points the campus can move, the most-missed questions with the reason behind each miss, step-by-step completion, a plan for tomorrow, and the class's history across every test it has taken.
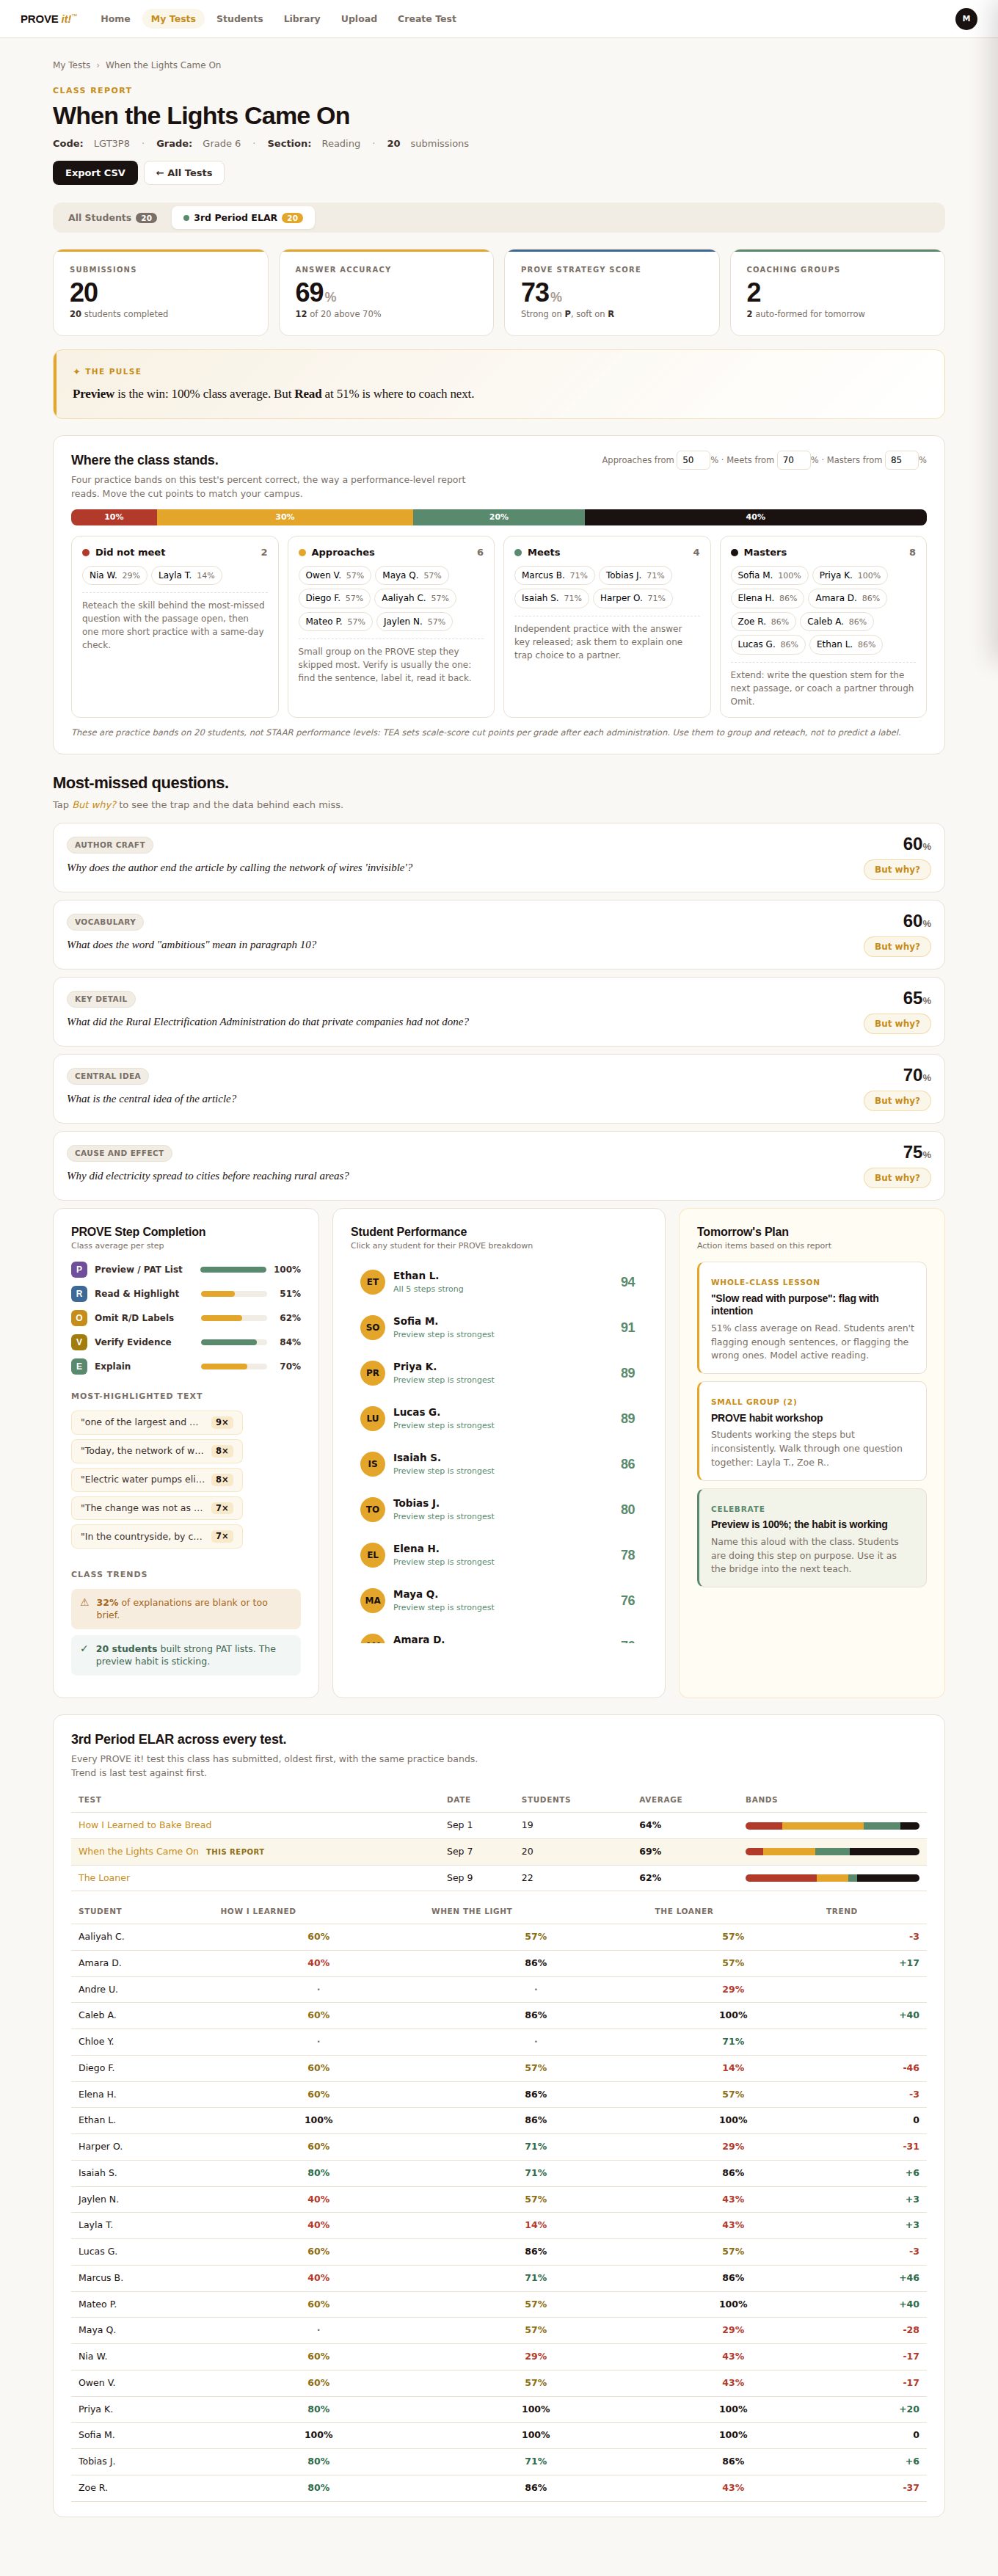
Practice bands are set on this test's percent correct with cut points the teacher or campus can adjust. They are not STAAR performance levels.
Exporting to district systems
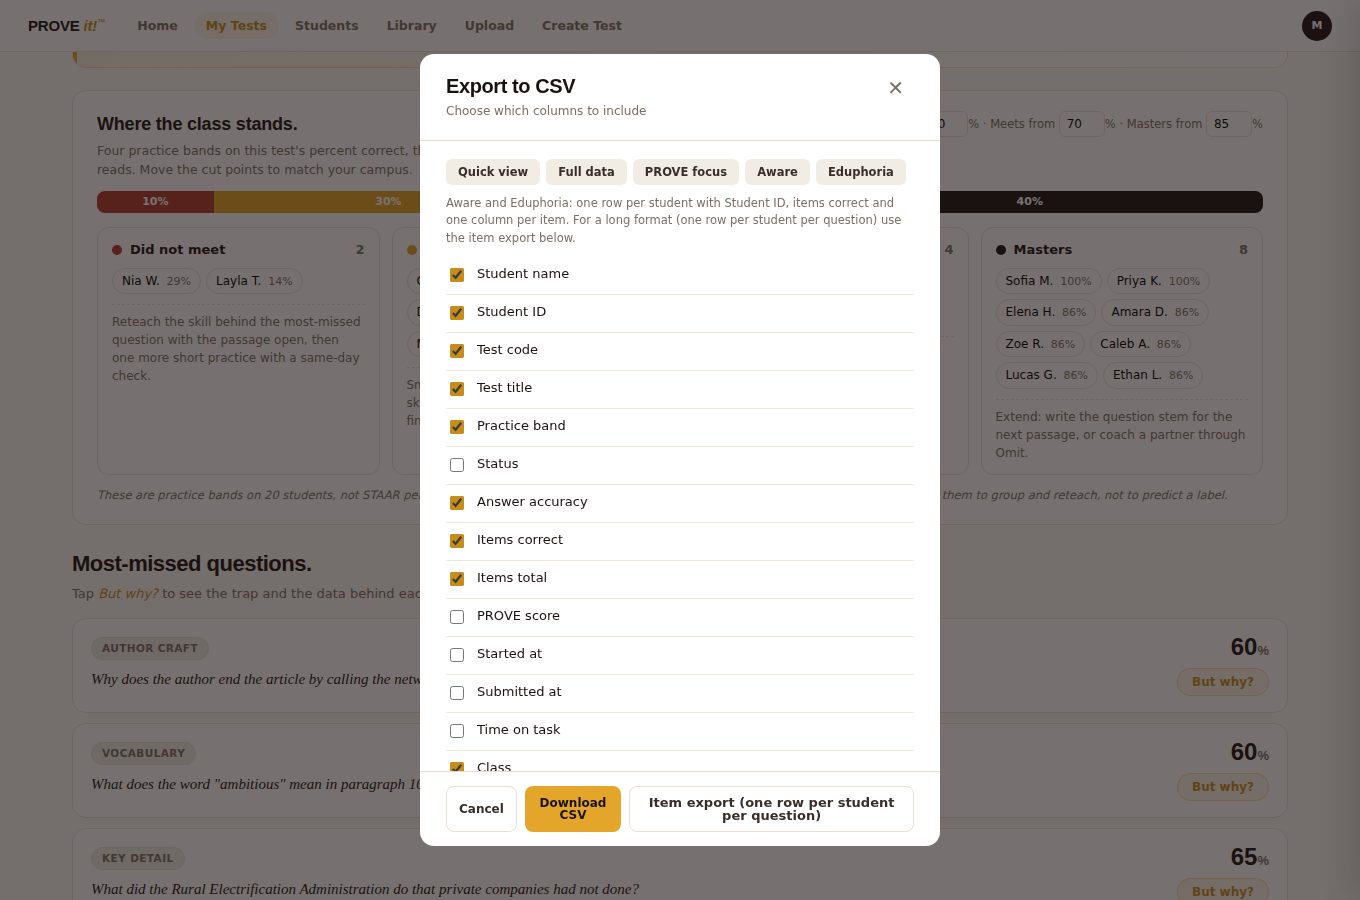
The export dialog on the same report offers presets for Aware and Eduphoria, a quick view, full data and a PROVE-focused set, plus an item-level file with one row per student per question.
One student, question by question
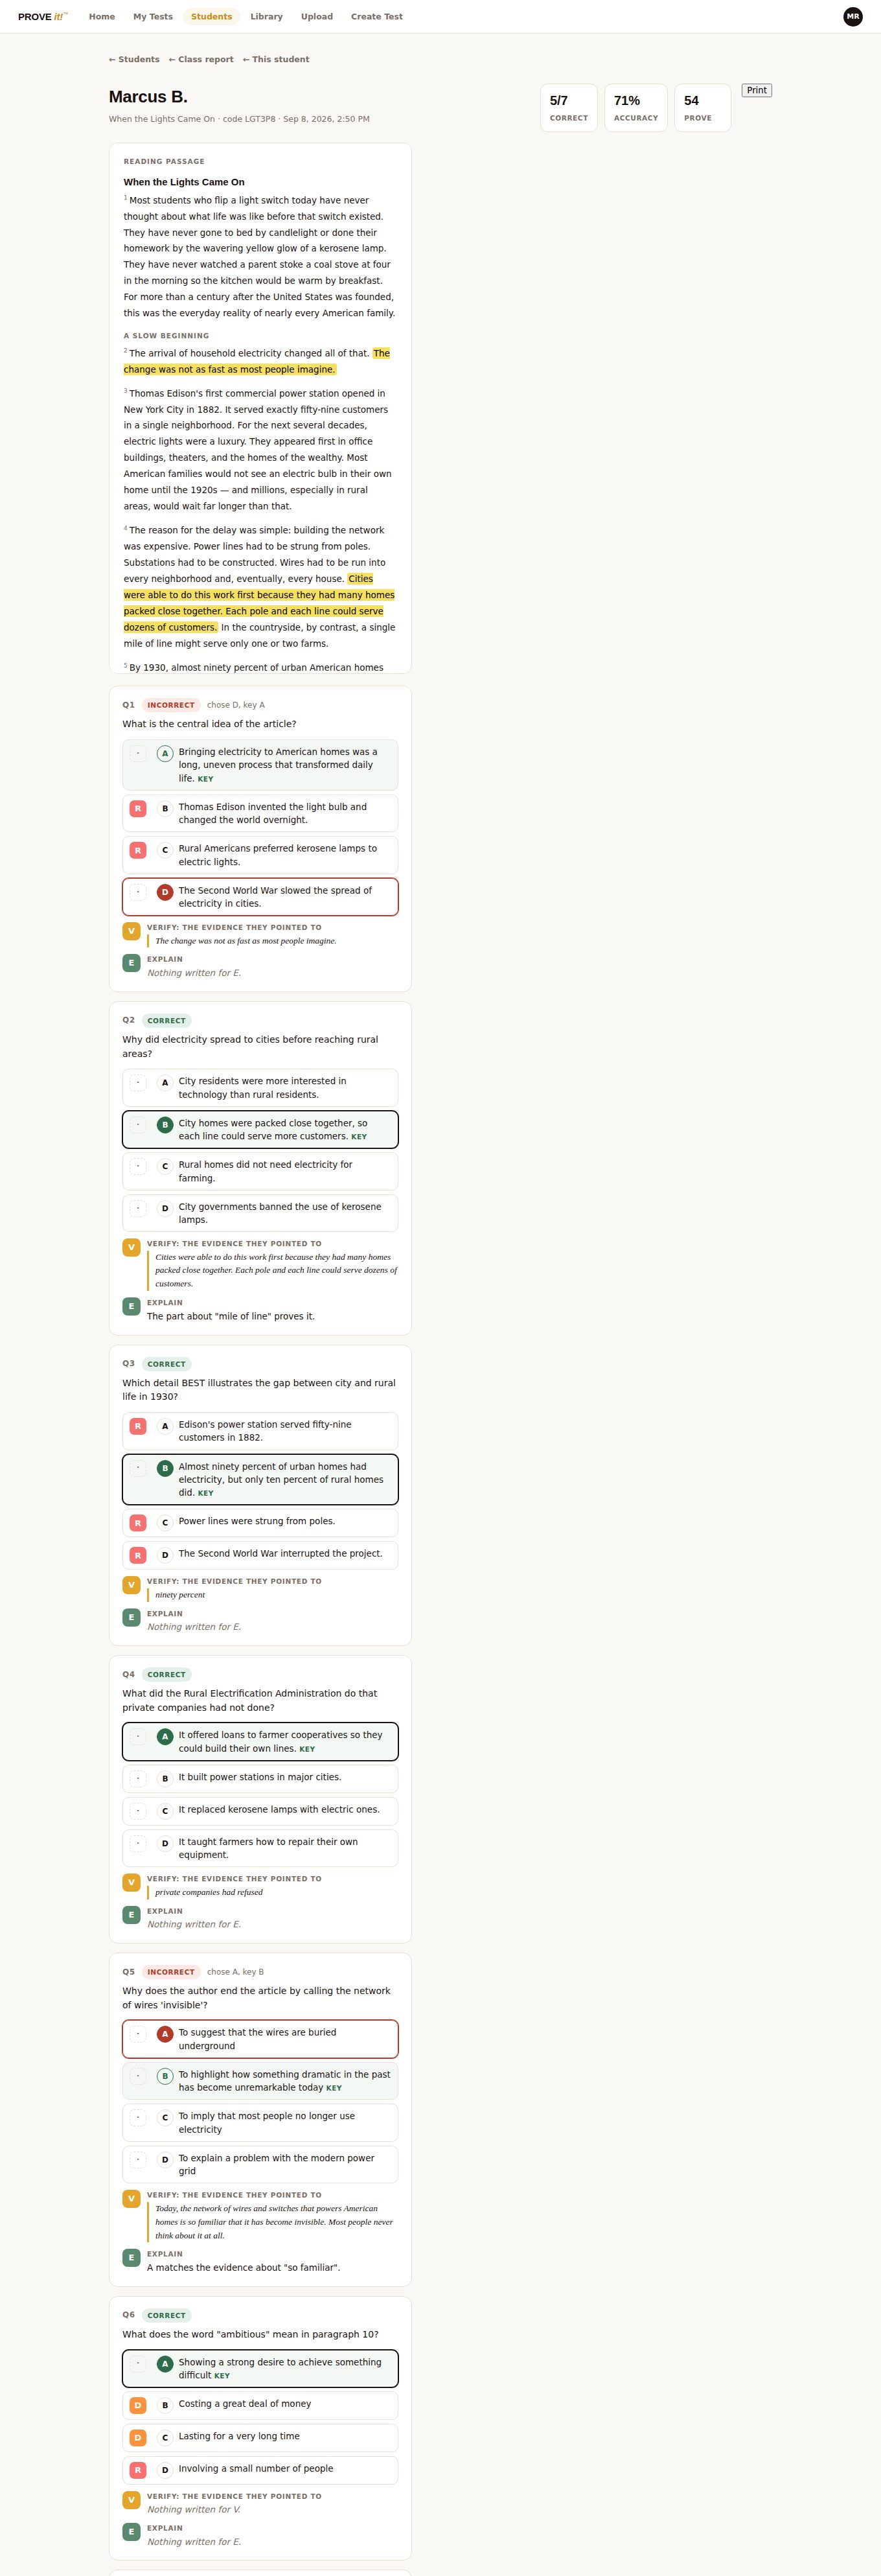
Marcus B.'s test as he left it: his highlights in the passage, the choices he marked as ridiculous or a distractor, the evidence he quoted, and what he wrote for Explain. The teacher reaches this from any name on the class report.
One student across tests
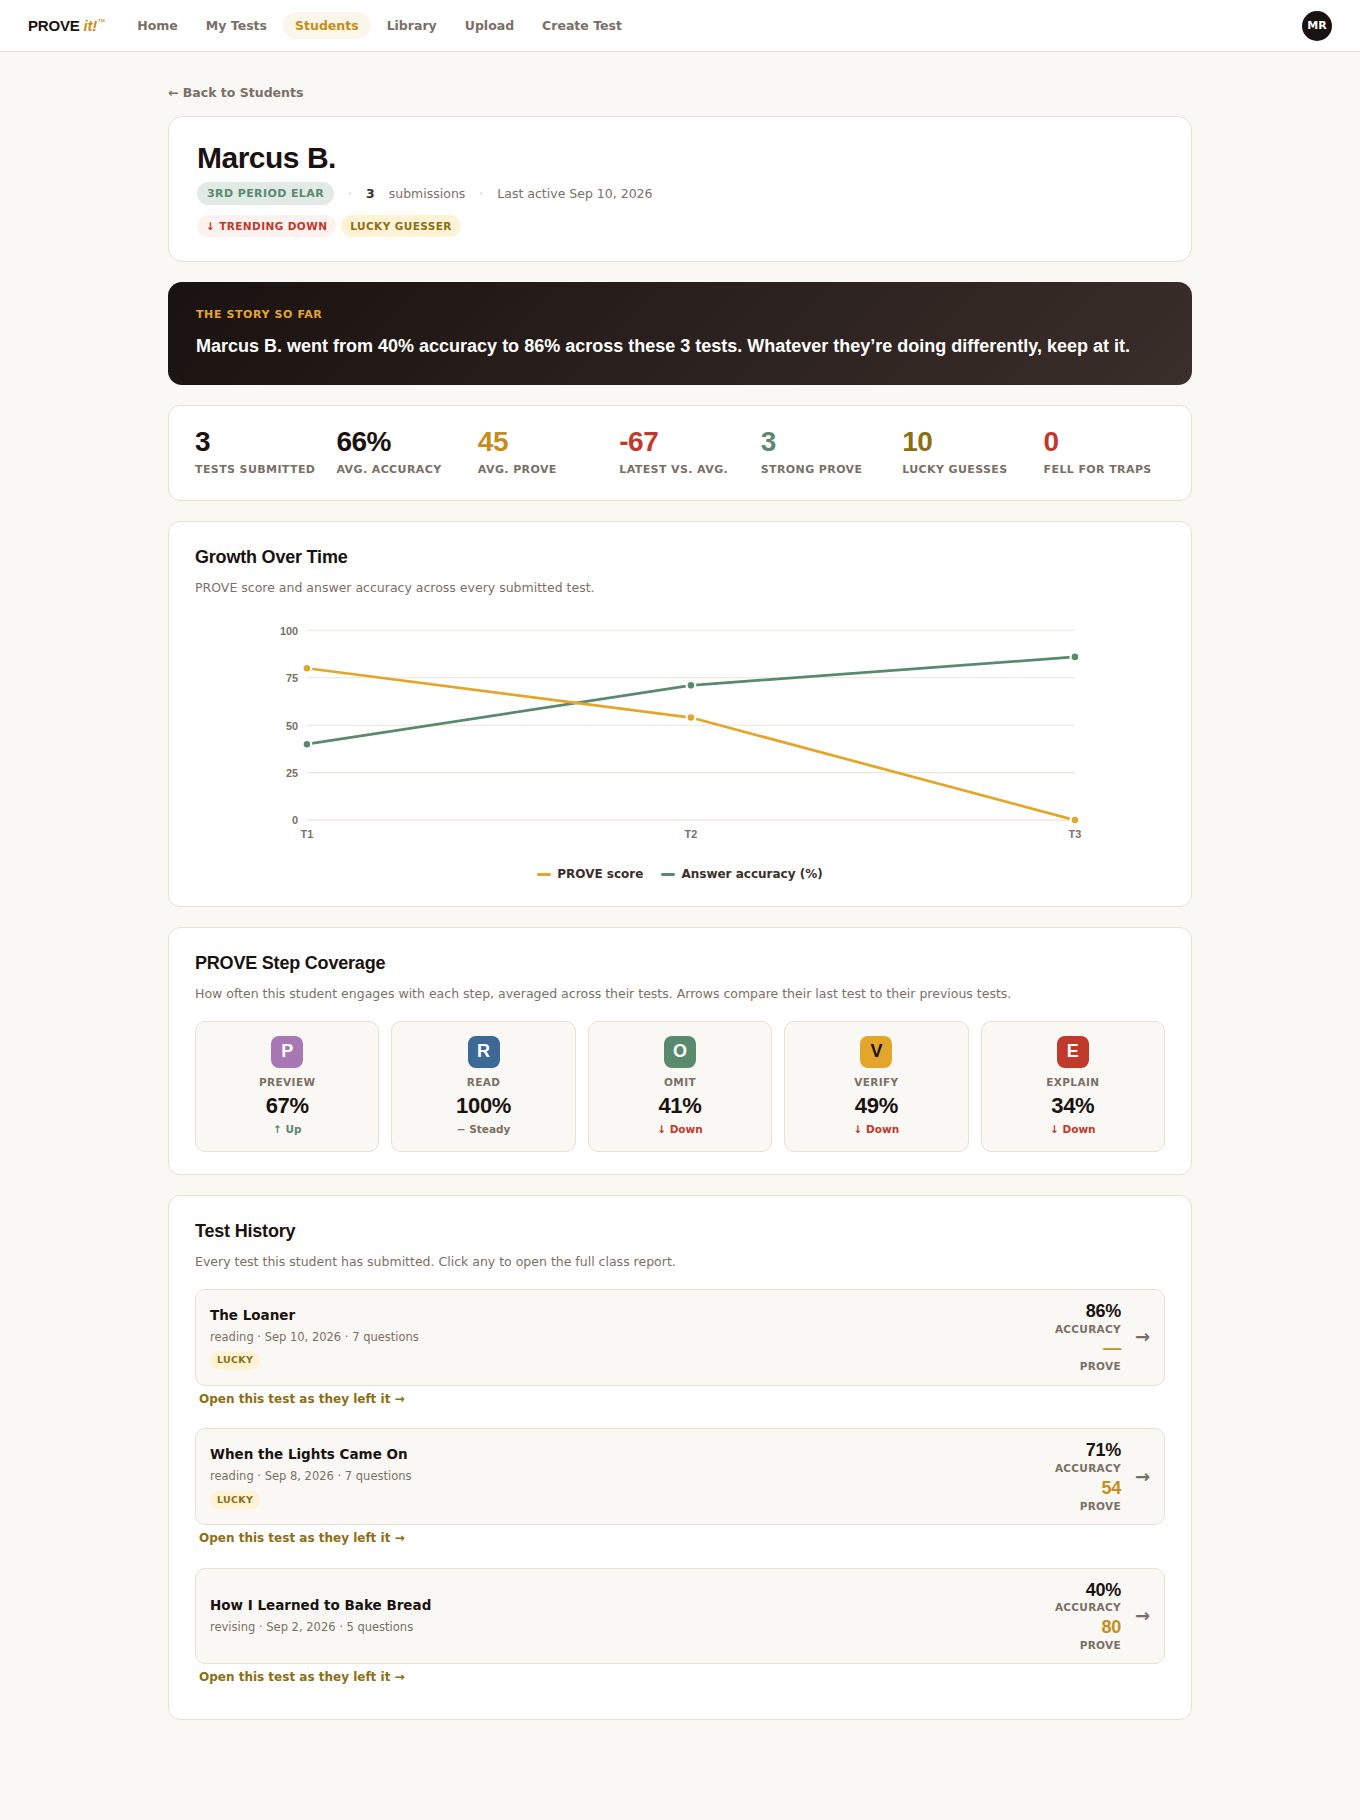
The same student's growth page: accuracy and PROVE score across his three tests, how consistently he uses each step, and a link back into each test as he left it. Teachers use this for conferences and intervention notes.
The P Strategy Intro activity
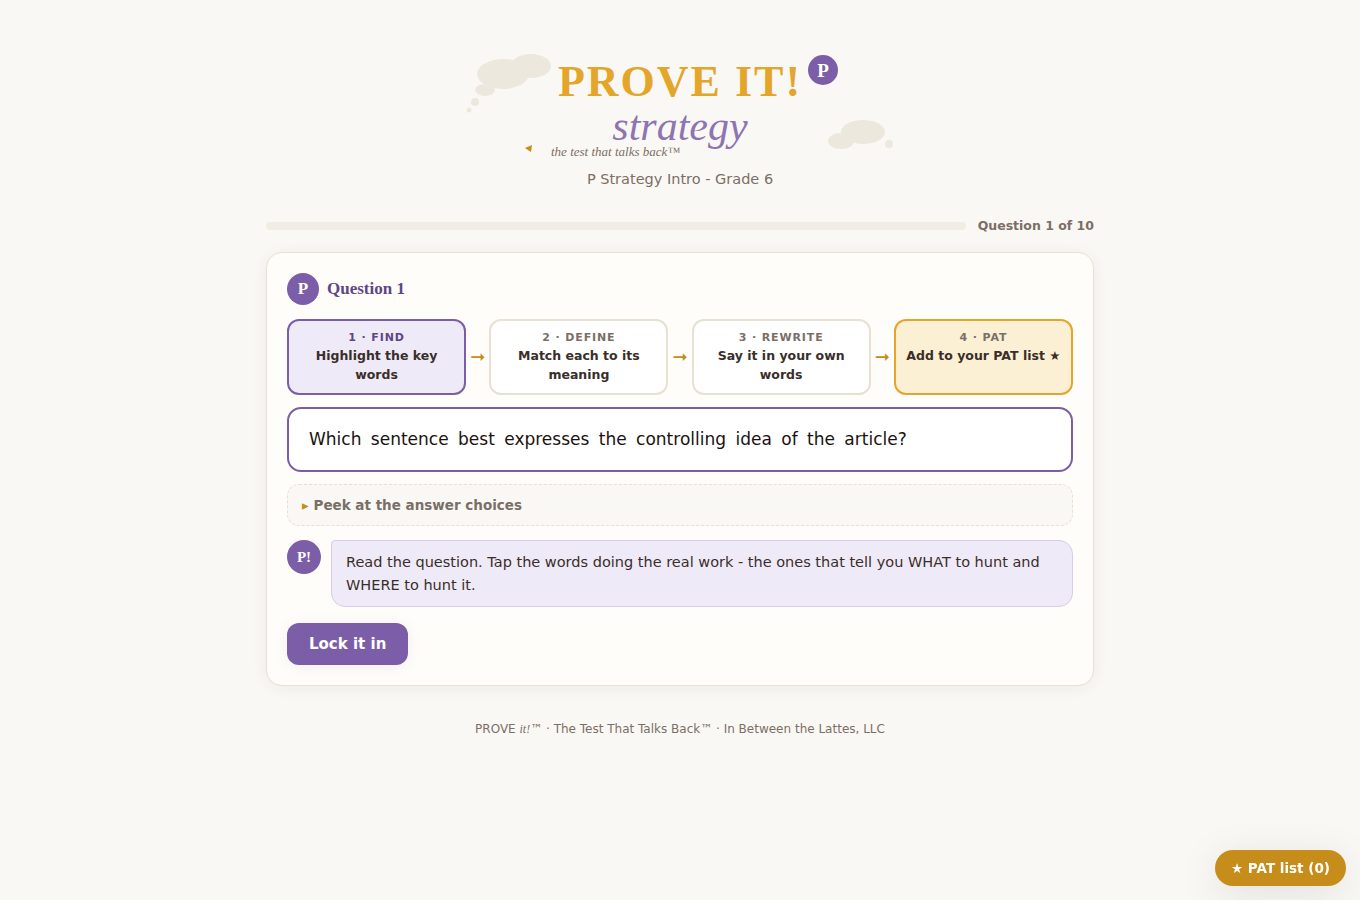
A short activity that teaches the first step before any test. Students find the key words in a question, match them to their meaning, say the question in their own words and add it to their PAT list. It is launched with a join code like any test.
The account page
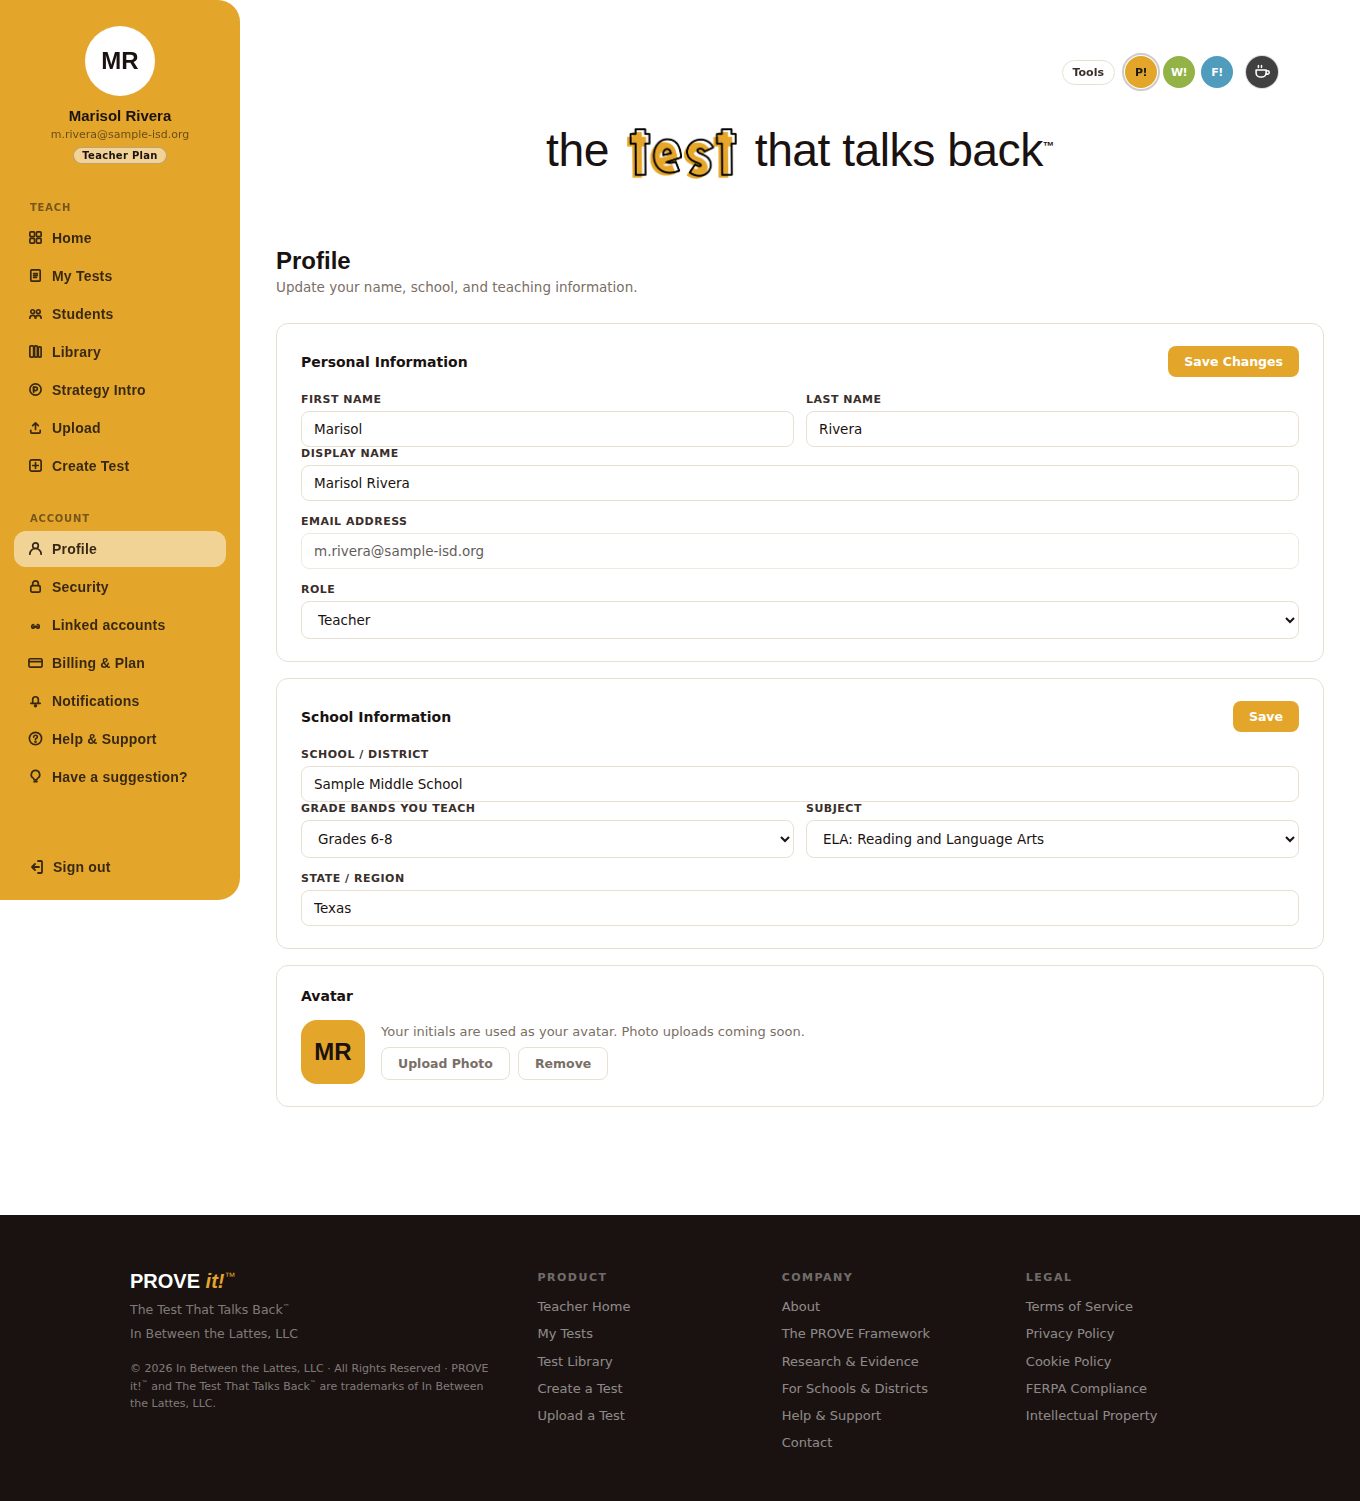
Profile and school details, security, linked accounts, billing and plan, notifications and support all live in one place. A teacher's initials are used as the avatar.
Want to see it with your own roster?
Request a quote for your campus or district, or go back to the overview.
PROVE it!™ and The Test That Talks Back™ are trademarks of In Between the Lattes, LLC. Sample data only; all student names are fictional.